
March 2025 Update
By Pete Maddicks & Tony Howard.
Last month we posted a photo of the ATC box that is to be mounted in the cab.
We who work in the MPD (Motive Power Department), do tend to speak in abbreviations, sometimes we will mention a component and forget to explain what they mean, or do as was pointed out to me by one of our shareholders, thank you Dave. Therefore let us make a start, ATC, Automatic Train Control, was first designed and introduced by the GWR in 1906. Known as the friend in the corner by footplate crews, it allowed them to run at express speeds in fog, falling snow and heavy rain. I was doing some research into the system I decided to use a diagram and abridged description from the “Handbook For Steam Locomotive Enginemen”, or the black book as it is known. I hope that this helps. If you would like a more in-depth insight I would suggest that you invest in a copy of the black book. I intend to make this an occasional feature, as a result of showing this article to a friend he said “you mentioned the vacuum retaining valve in a past update, what does it do?” I will look at this next time.
GWR ATC System
The primary object of this system is to give an audible warning on the engine when the train is approaching a distant signal. If the distant signal is at caution the ramp between the rails is electrically dead and a siren will sound, if the driver does not acknowledge the siren by lifting a lever on the right-hand side of the box the system will bring the train to a stand before the next Stop signal. If however, the distant signal is off the ramp will be electrically live and a bell will ring and the train can proceed as normal. Therefore if a fault should occur the system will “fail-safe”.
March has got off to a good start, although not for me as I have been off with some bug or other! The boys have been working on the cab roof, and the cladding. Also as the loco had to come out of the shed to let the DMU (Diesel Multiple Unit) power car out of the paint shop, and 1450 in. The opportunity was taken to fill the water tank under the bunker. There were a few small leaks, but nothing serious.
Saturday, March 1st.
Dave Mc, Jacob Jack K, Jacob L, Kevin S, Peter M, Phil D, Simon B, Tony H, Ollie R.
The rear window frames needed to be removed so the final riveting on the Bunker/Cab could be done. Special washers were made so the bolt heads were not directly against the Brass foot valves. Ollie made the three 5/16" Whitworth brass countersunk screws that were missing from the window frames.
Monday 3rd March.
Bob L, Charles L, Dave L, Dave Mc, Peter D, Peter M, Phil H, Steve T, Tony H.
Tony brought one panel of the armoured glass that he was keeping at his house, to check the fitting in the window frames. It fitted correctly.
The spring clips that hold the front windows firmly closed were re-fitted so they were on the center line of the opening handle.
A lot more work was done on cladding, painting, and the nuts and bolts that hold the cab roof to the bunker.
Saturday 8th March.
Kevin S, Simon B, Steve M, Tony H
Rear window frames re-fitted. Holes drilled in the beading on the bunker.
Monday 10th March.
Bob L, Charles L, Dave L, Dave Mc, Peter D, Si B, Steve T, Tony H.
The loco needed to be shunted outside to get the D M U out of the paint shop. This gave us another go at filling the bunker with water. This time we filled the bunker to the top. More rivets seeping as well as some bolts on the balance pipes and some fixing bolts. The large cladding sheet that covers the firebox was fitted. The sliding covers that fit either side of the cab were also brought from storage. These will be temporarily fitted on Saturday along with the front window frames.
Saturday 15th March.
Jacob L, Kevin S, Simon B, Steve M, Tony H.
Front window frames re-fitted. The sliding covers were temporarily fitted. Driver's side will need fettling so it slides more freely.
Monday 17th March.
Bob L, Bryn T, Charles L, Dave L, Dave Mc, Peter D, Steve T, Tony H.
Work carried on with the cladding, windows and painting.
Saturday 22nd March.
Jack K, Kevin S, Simon B, Tony H.
Jack worked on the copper cap for the chimney. He then turned his attention to the copper pipework that feeds water to the clacks. The rest of us removed the window frames that hold the glass. Then we removed all the bolts and nuts except four that secure the cab roof. The last four will be removed on Monday when a smaller person can squeeze into the left-hand water tank to remove the nuts.
Sunday 23rd March.
Jack K, Steve T.
Work continues on the copper pipework to the clacks.
Monday 24th March.
Bob L, Charles L, Dave L, Peter D, Phil H, Steve T, Tony H.
Charles got into the left-hand tank to remove the nuts off the bolts. All nuts and bolts are now removed from the cab roof. For some time we didn't like the profile of the round-headed bolts that secure the cab roof to the water tanks. Phil altered them to a better profile on the lathe.
Charles went into the water space in the bunker to put a lead washer on the bottom of the handrail, this was an area that was leaking when the bunker was filled with water a few weeks ago. He noticed another area that was leaking, took a photo of it so we can decide the best way to seal it. The good thing about this examination is that we noticed that rust is forming on the unpainted areas, so the rivets that were sealing water will rust up and seal. Further work was done on the cladding.
Thursday 27th March
Peter W, Peter D, Chris of Powys Steel.
Today work started on fabricating the main steam pipes. The fireman’s side pipe was positioned and tack welded together and returned to his workshop for completion.
Saturday 29th March
Jack K, Jacob L, Kevin S, Steve M, Tony H.
Given the loco a good clean ready for next week's Open House weekend. Jack was working on the copper pipework.
Monday 31st March.
No work today
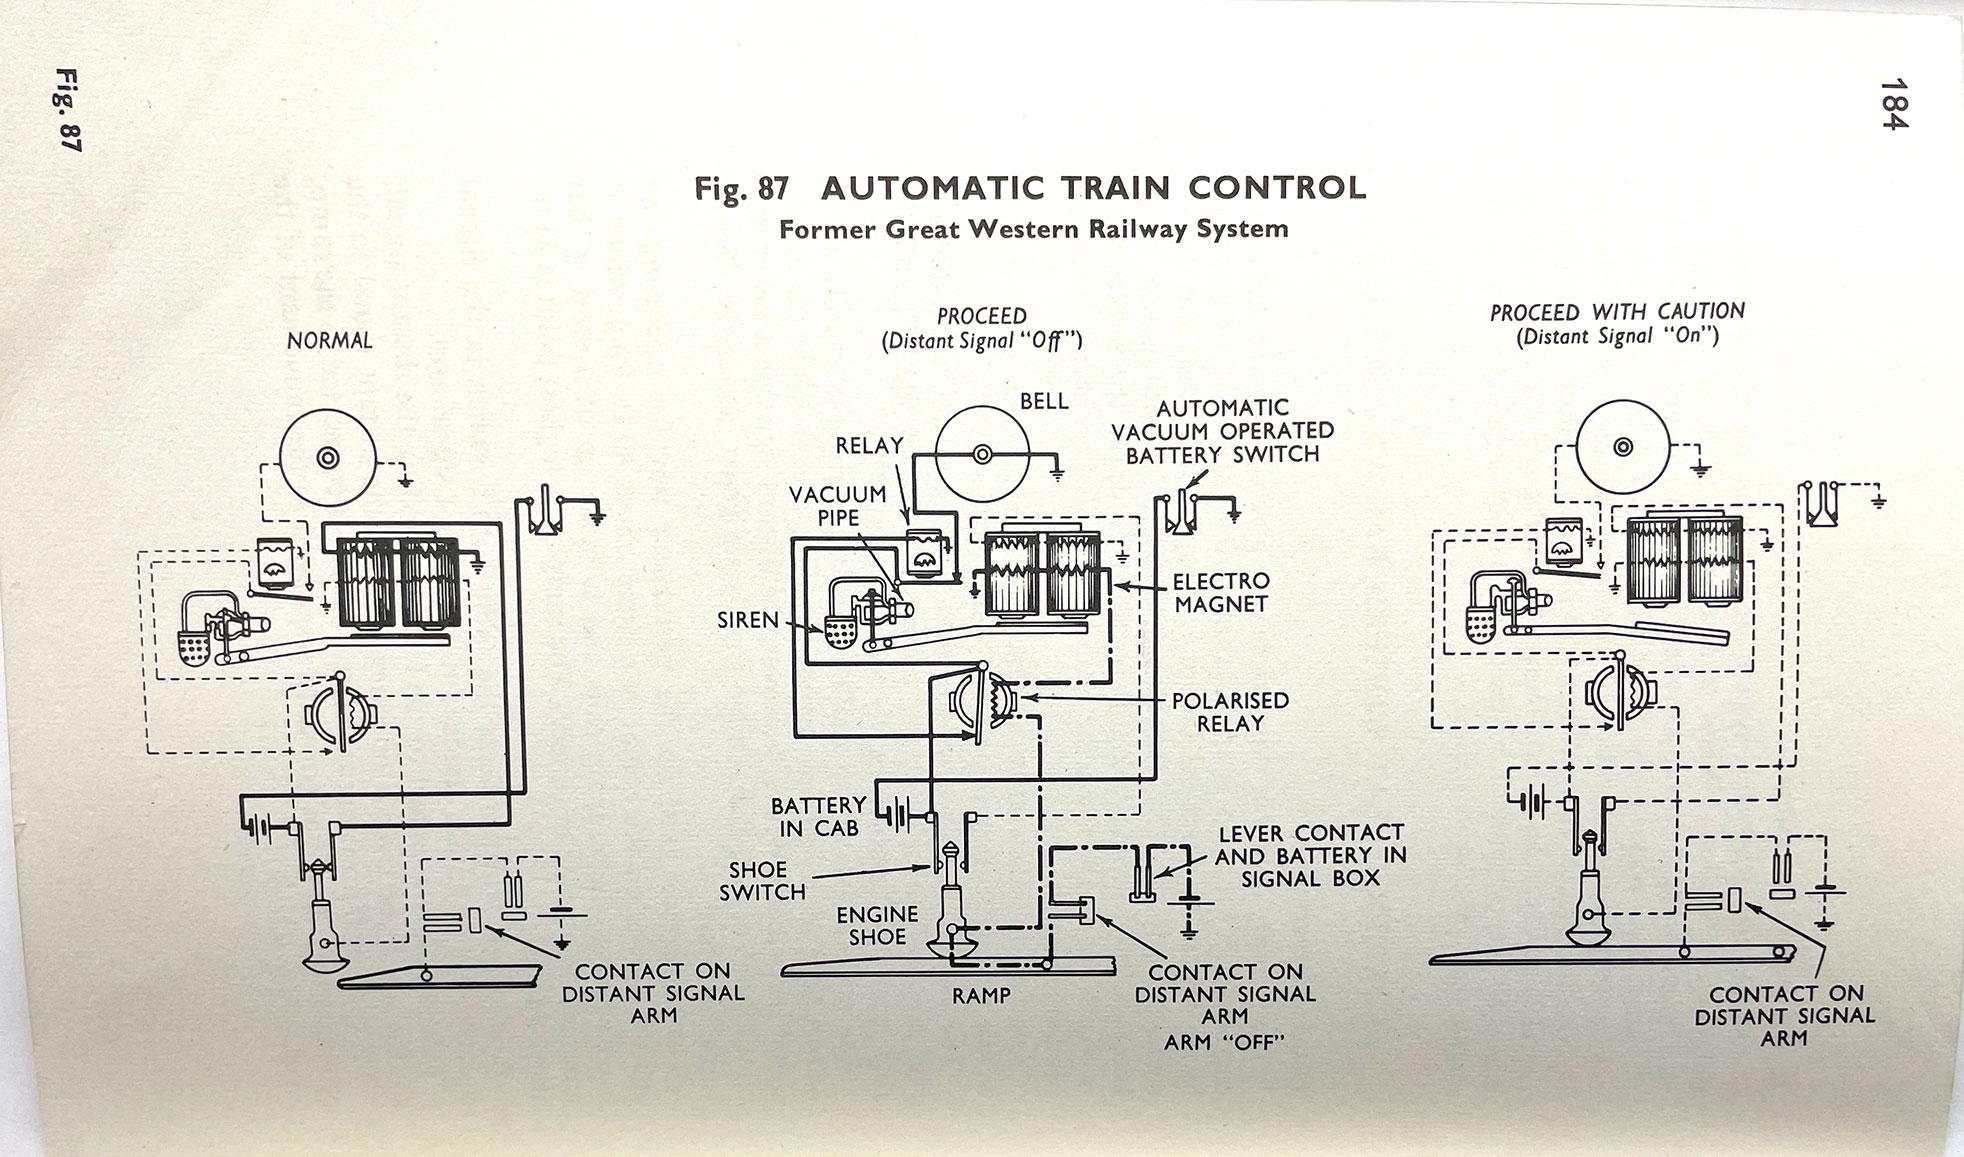
ATC diagram showing the system in three states, normal, distant signal off, and distant signal on.
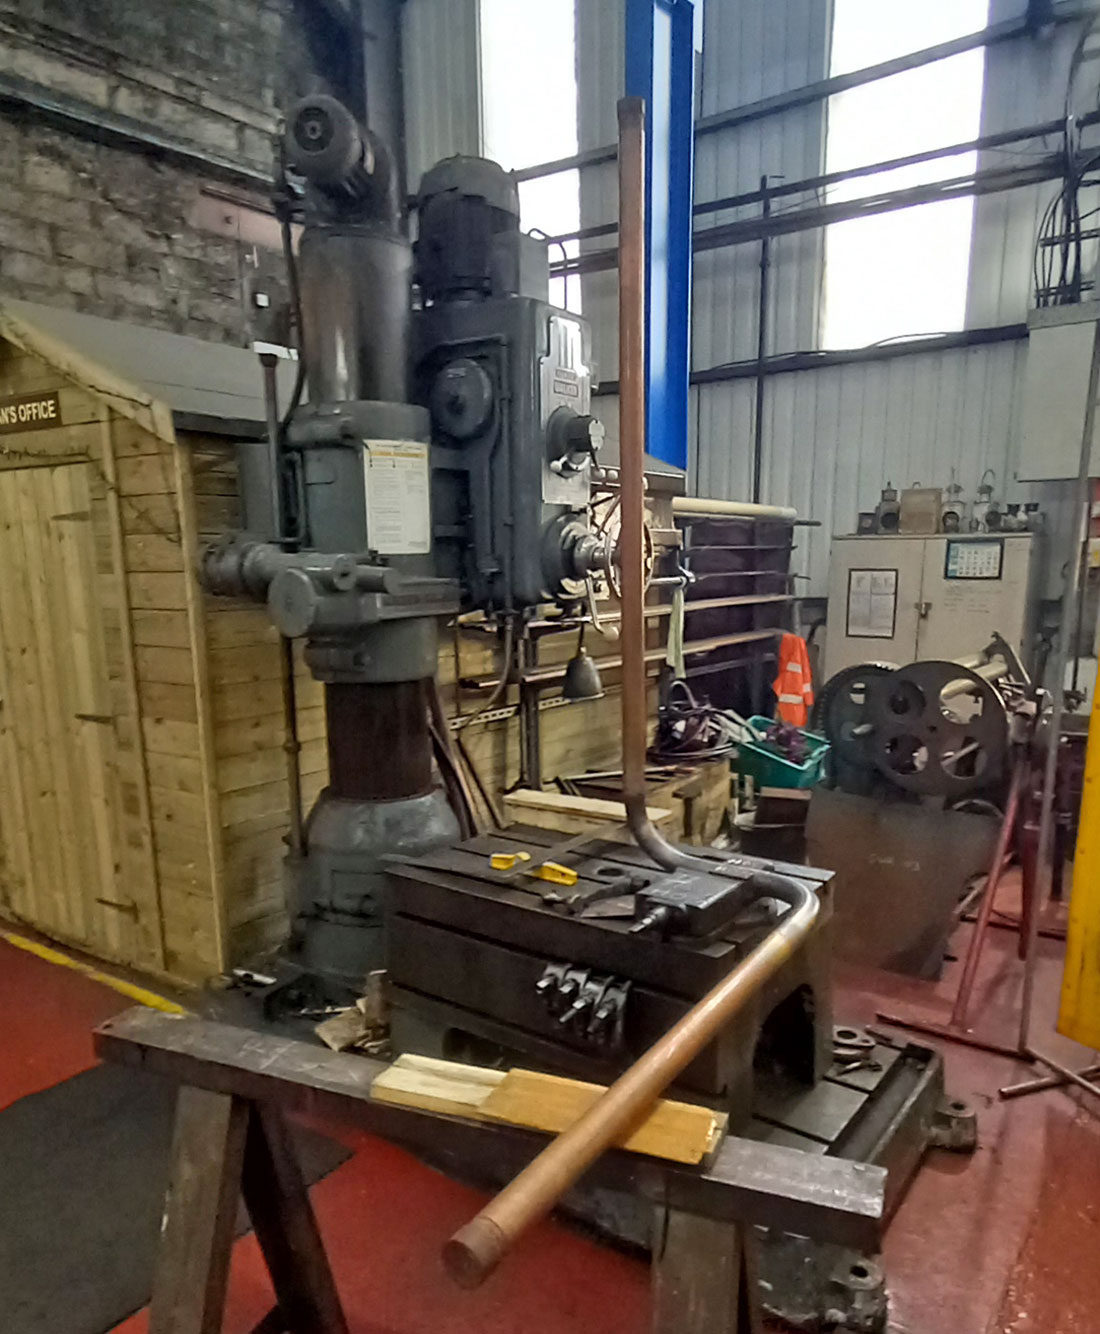
The first of the water delivery pipes up to the clack boxes that pass through the tanks. Photo: Tony H.
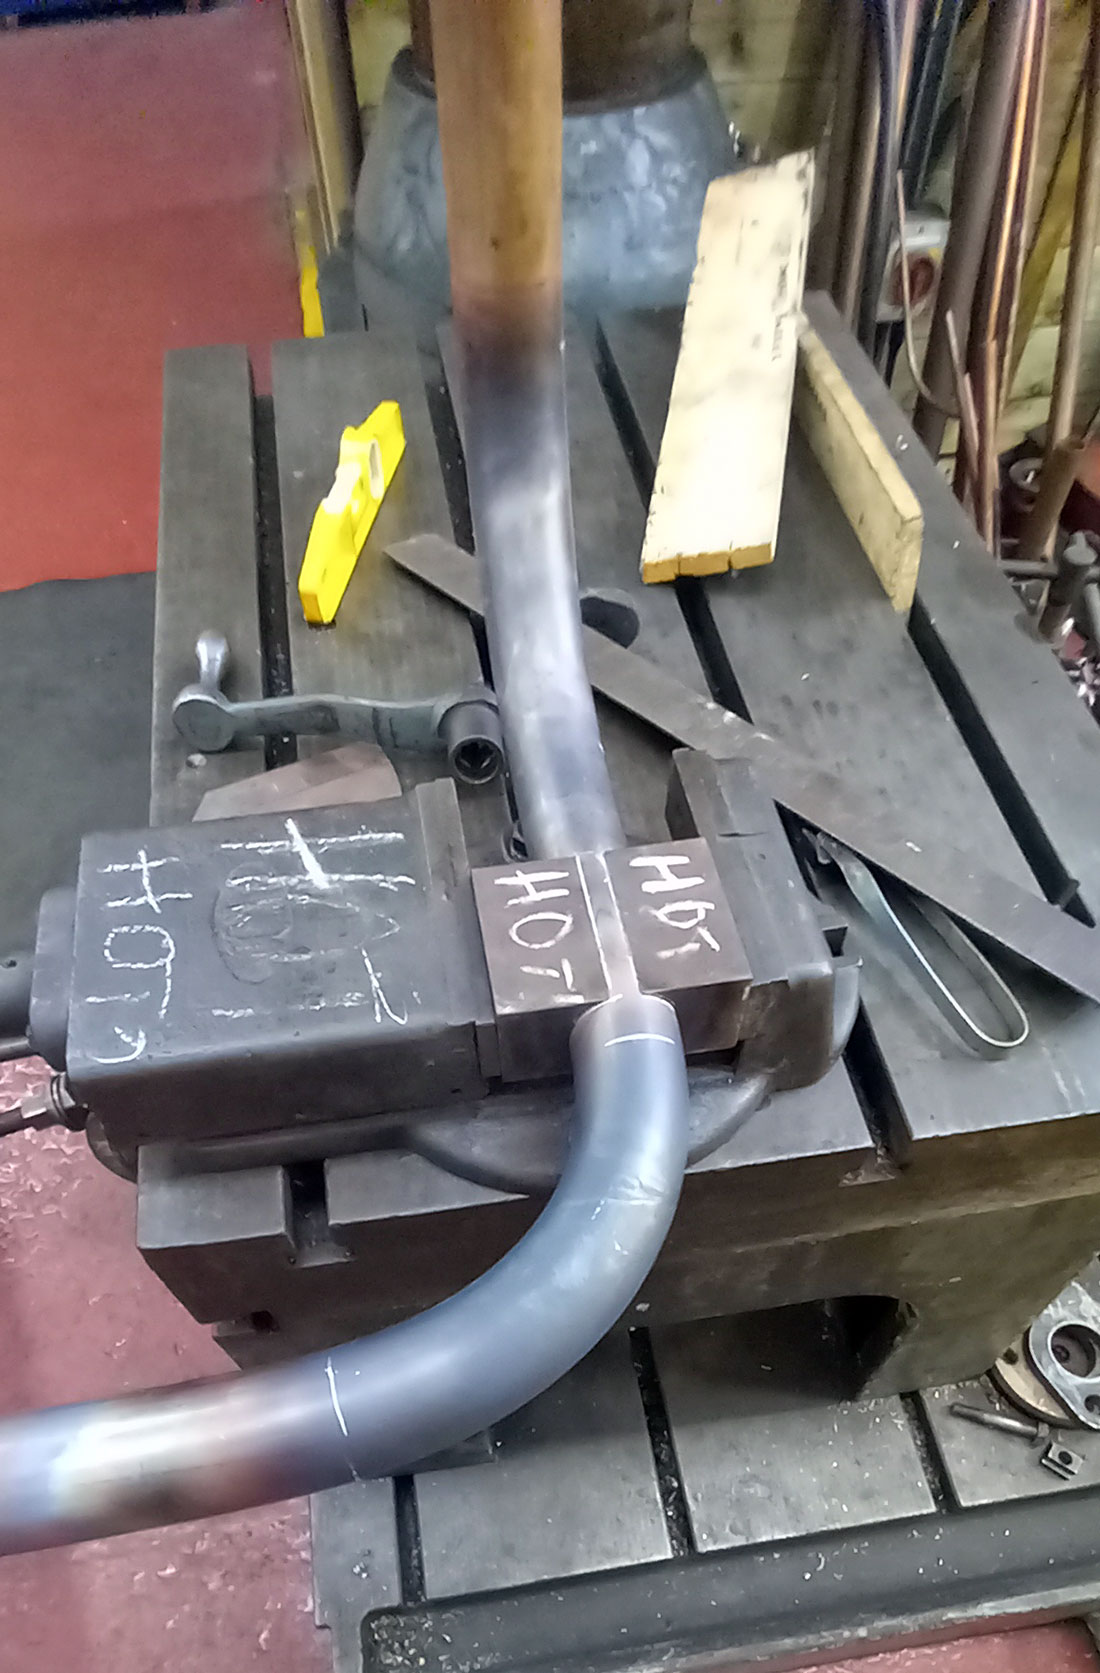
The delivery pipe in the workshop vice having been bent and still cooling down. Photo: Tony H.
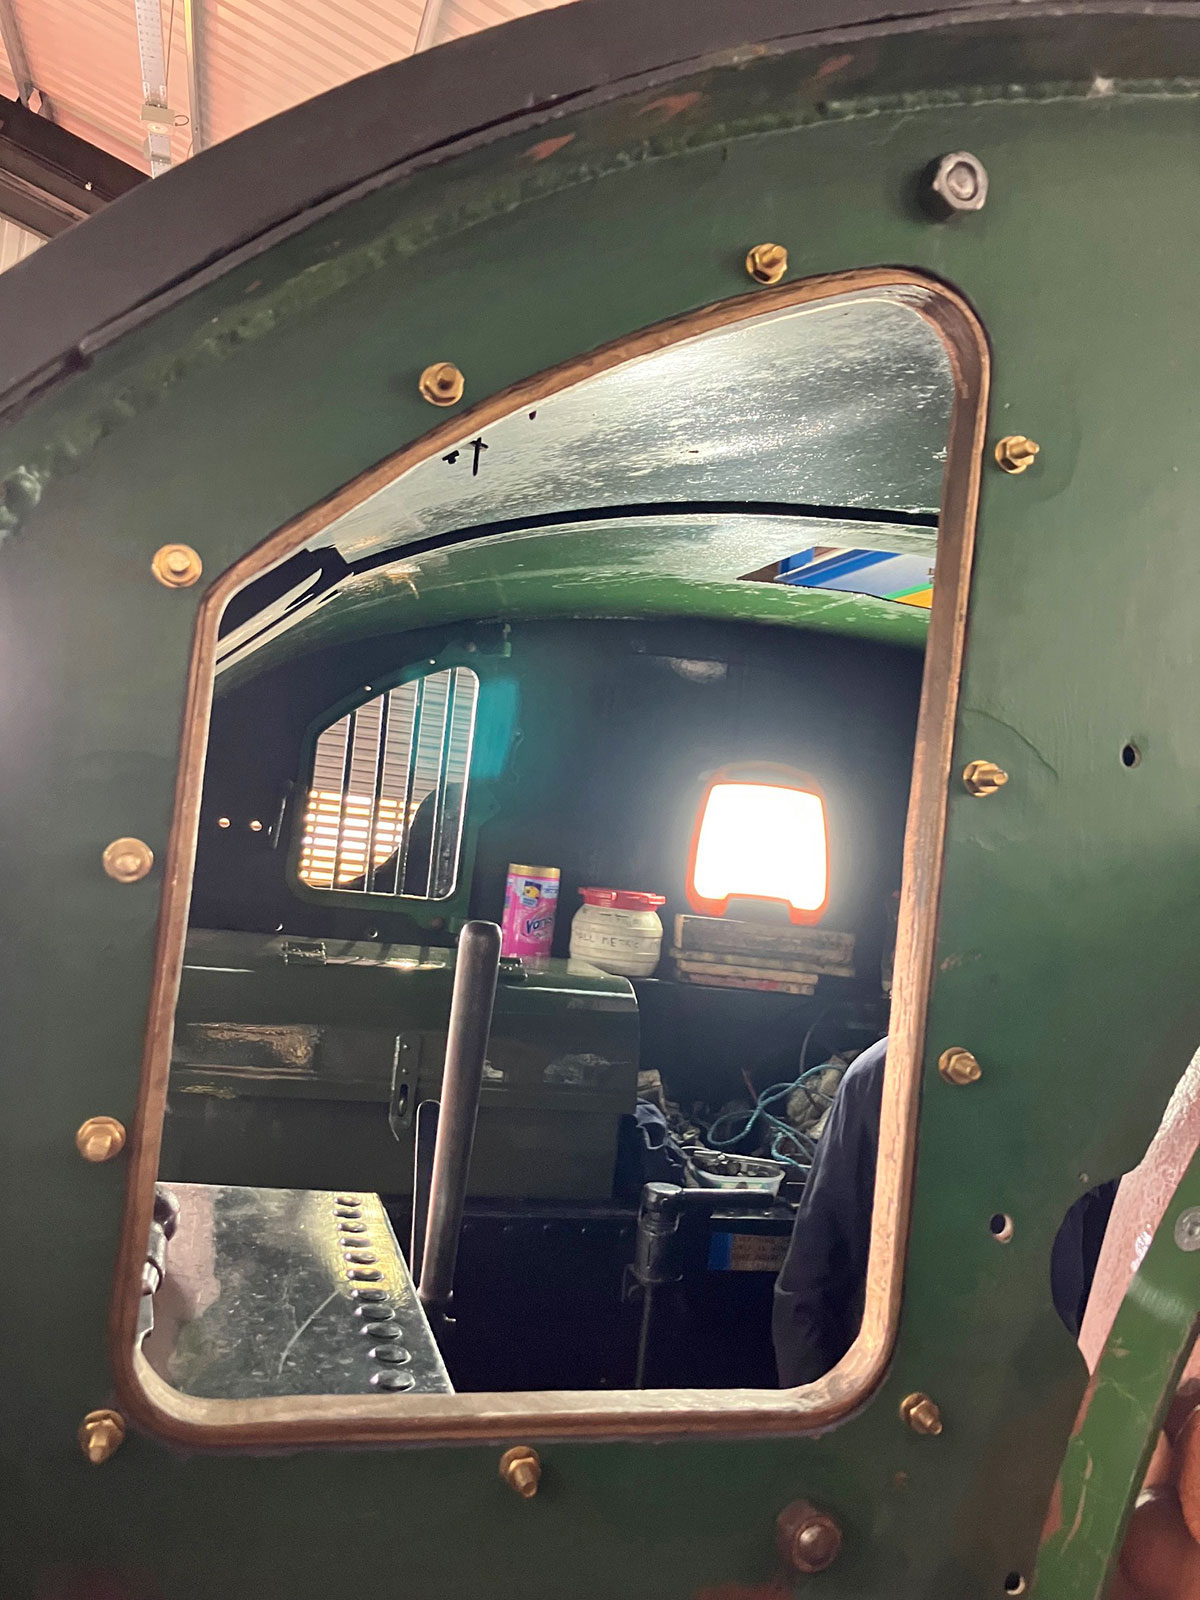
The driver’s side cab window in place. Photo: Simon B.
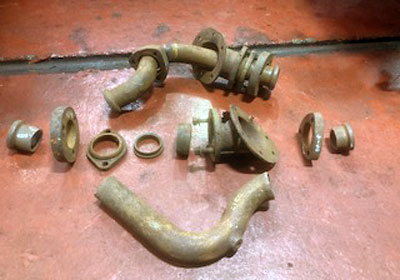
The old main steam pipes, one has been cut up to remove all the parts that are to be reused and the other one kept in one place as a template. Photo: Dave Mc.
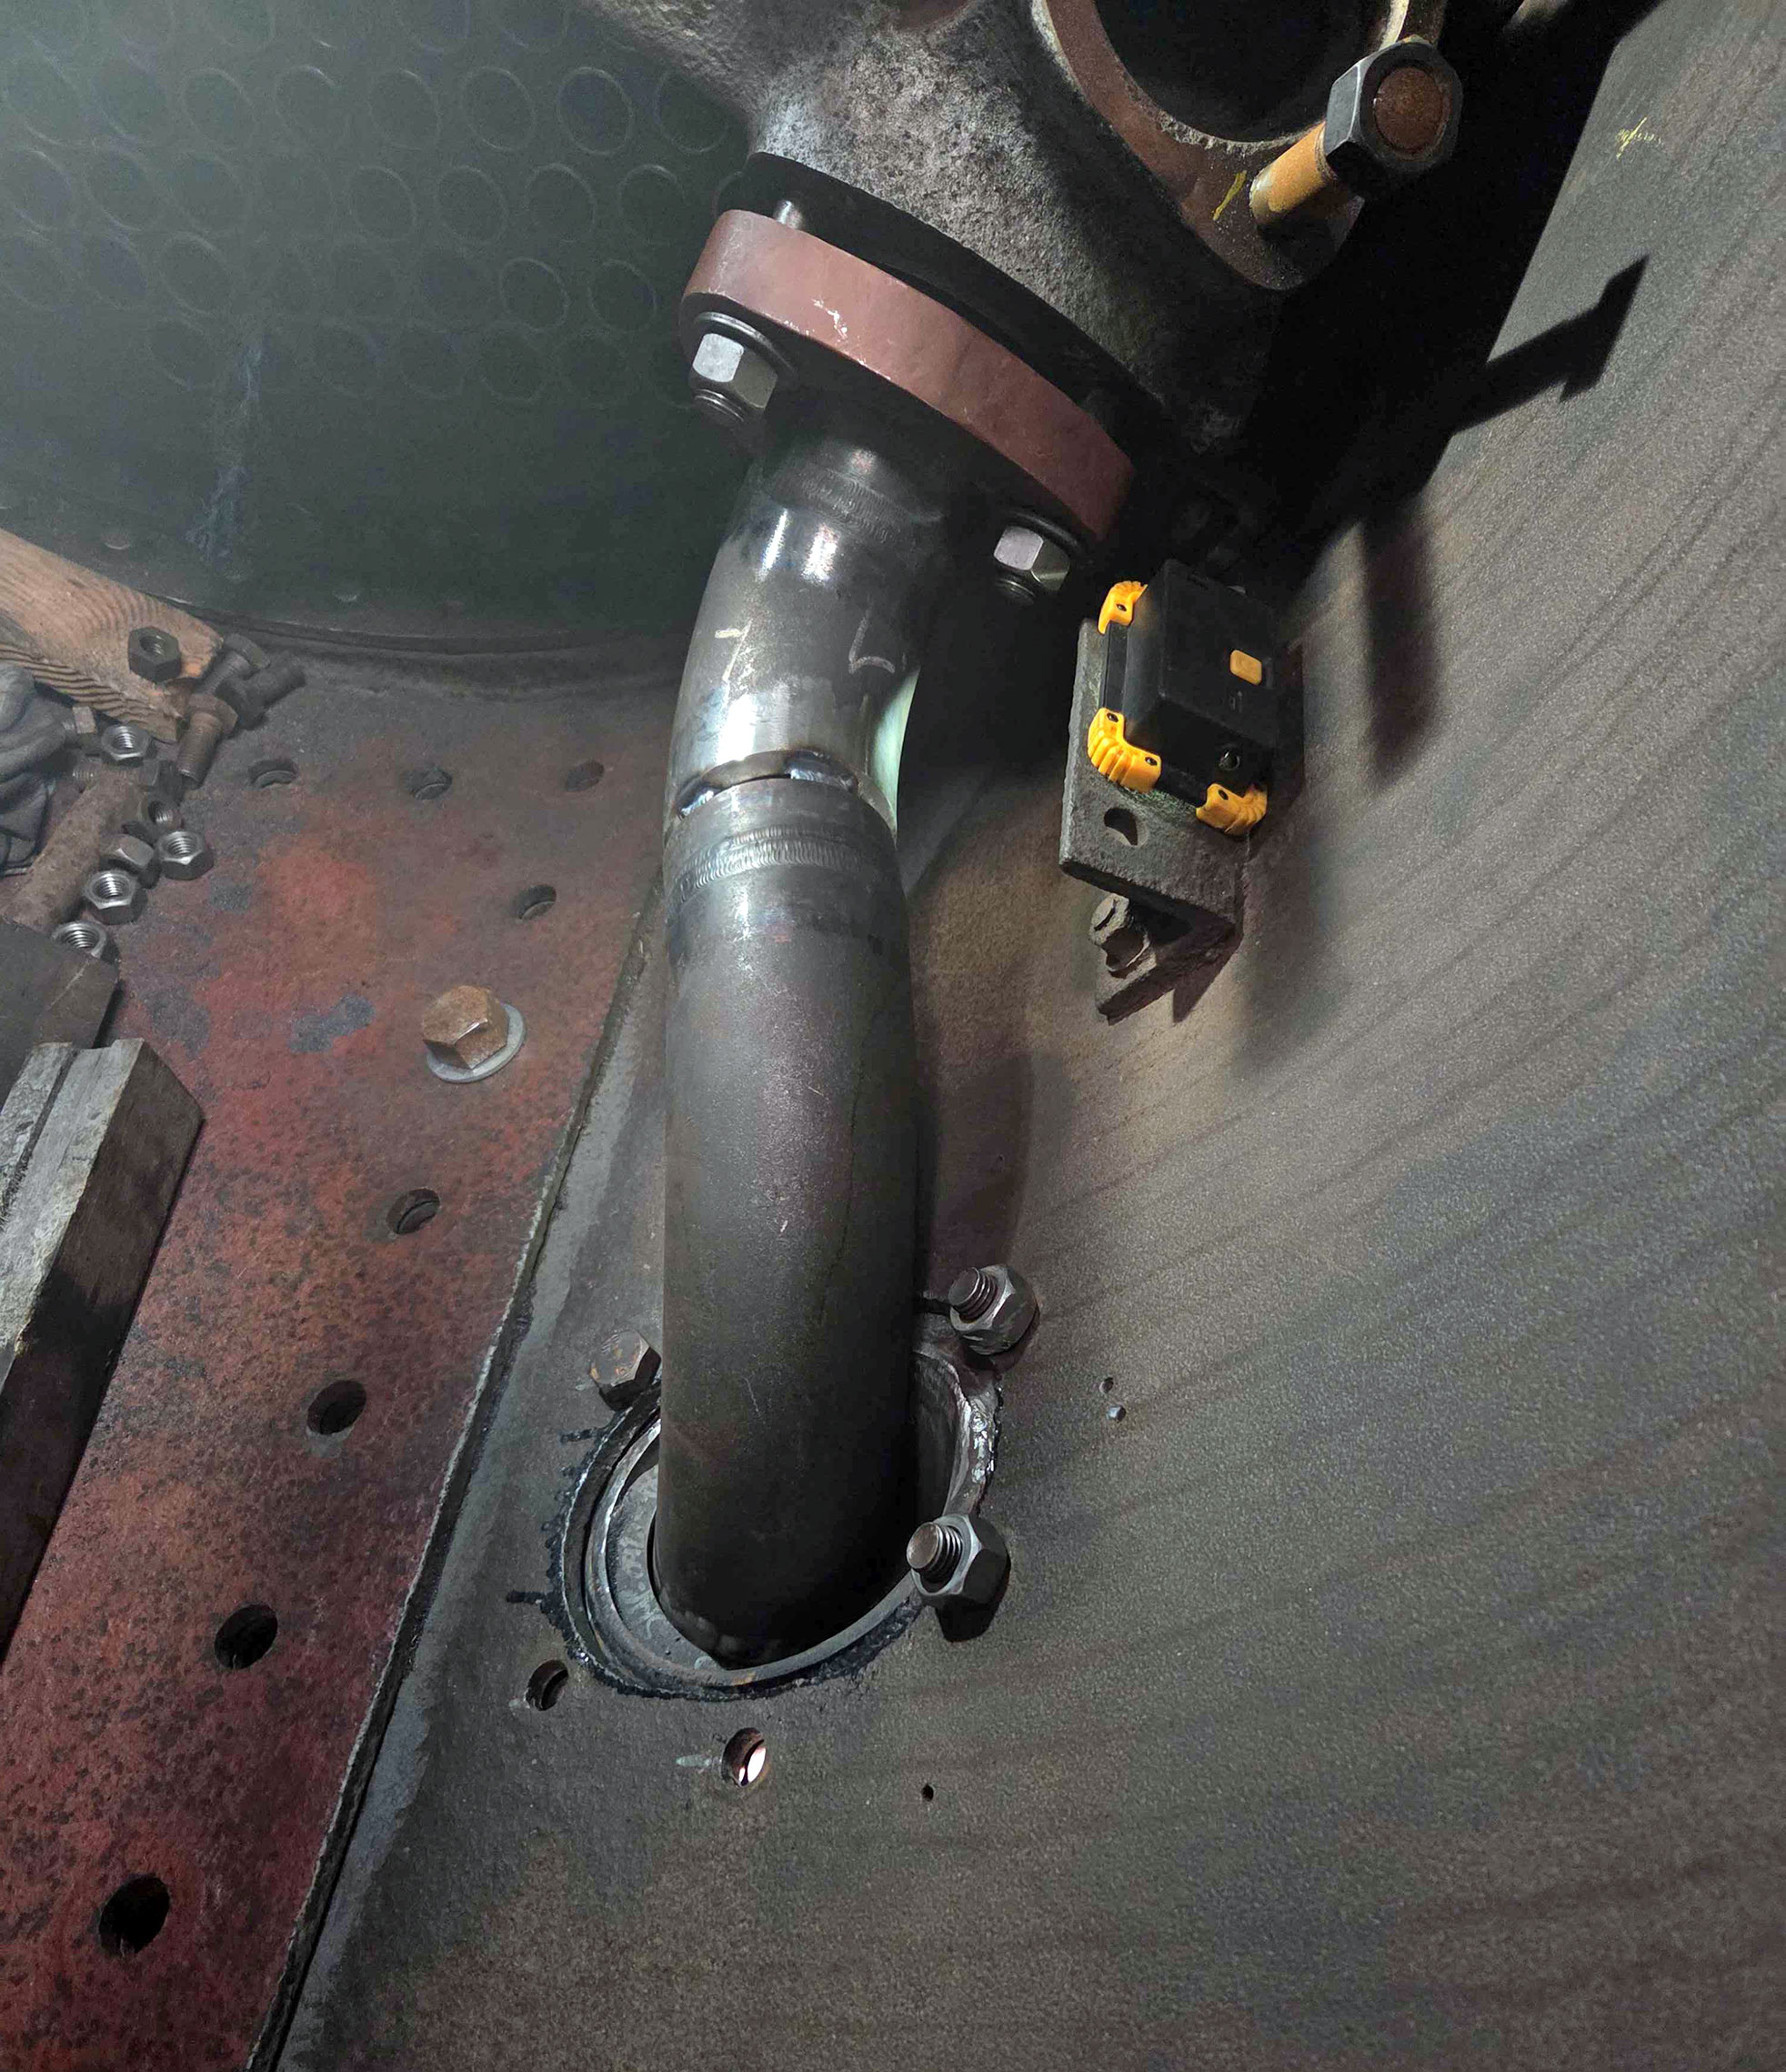
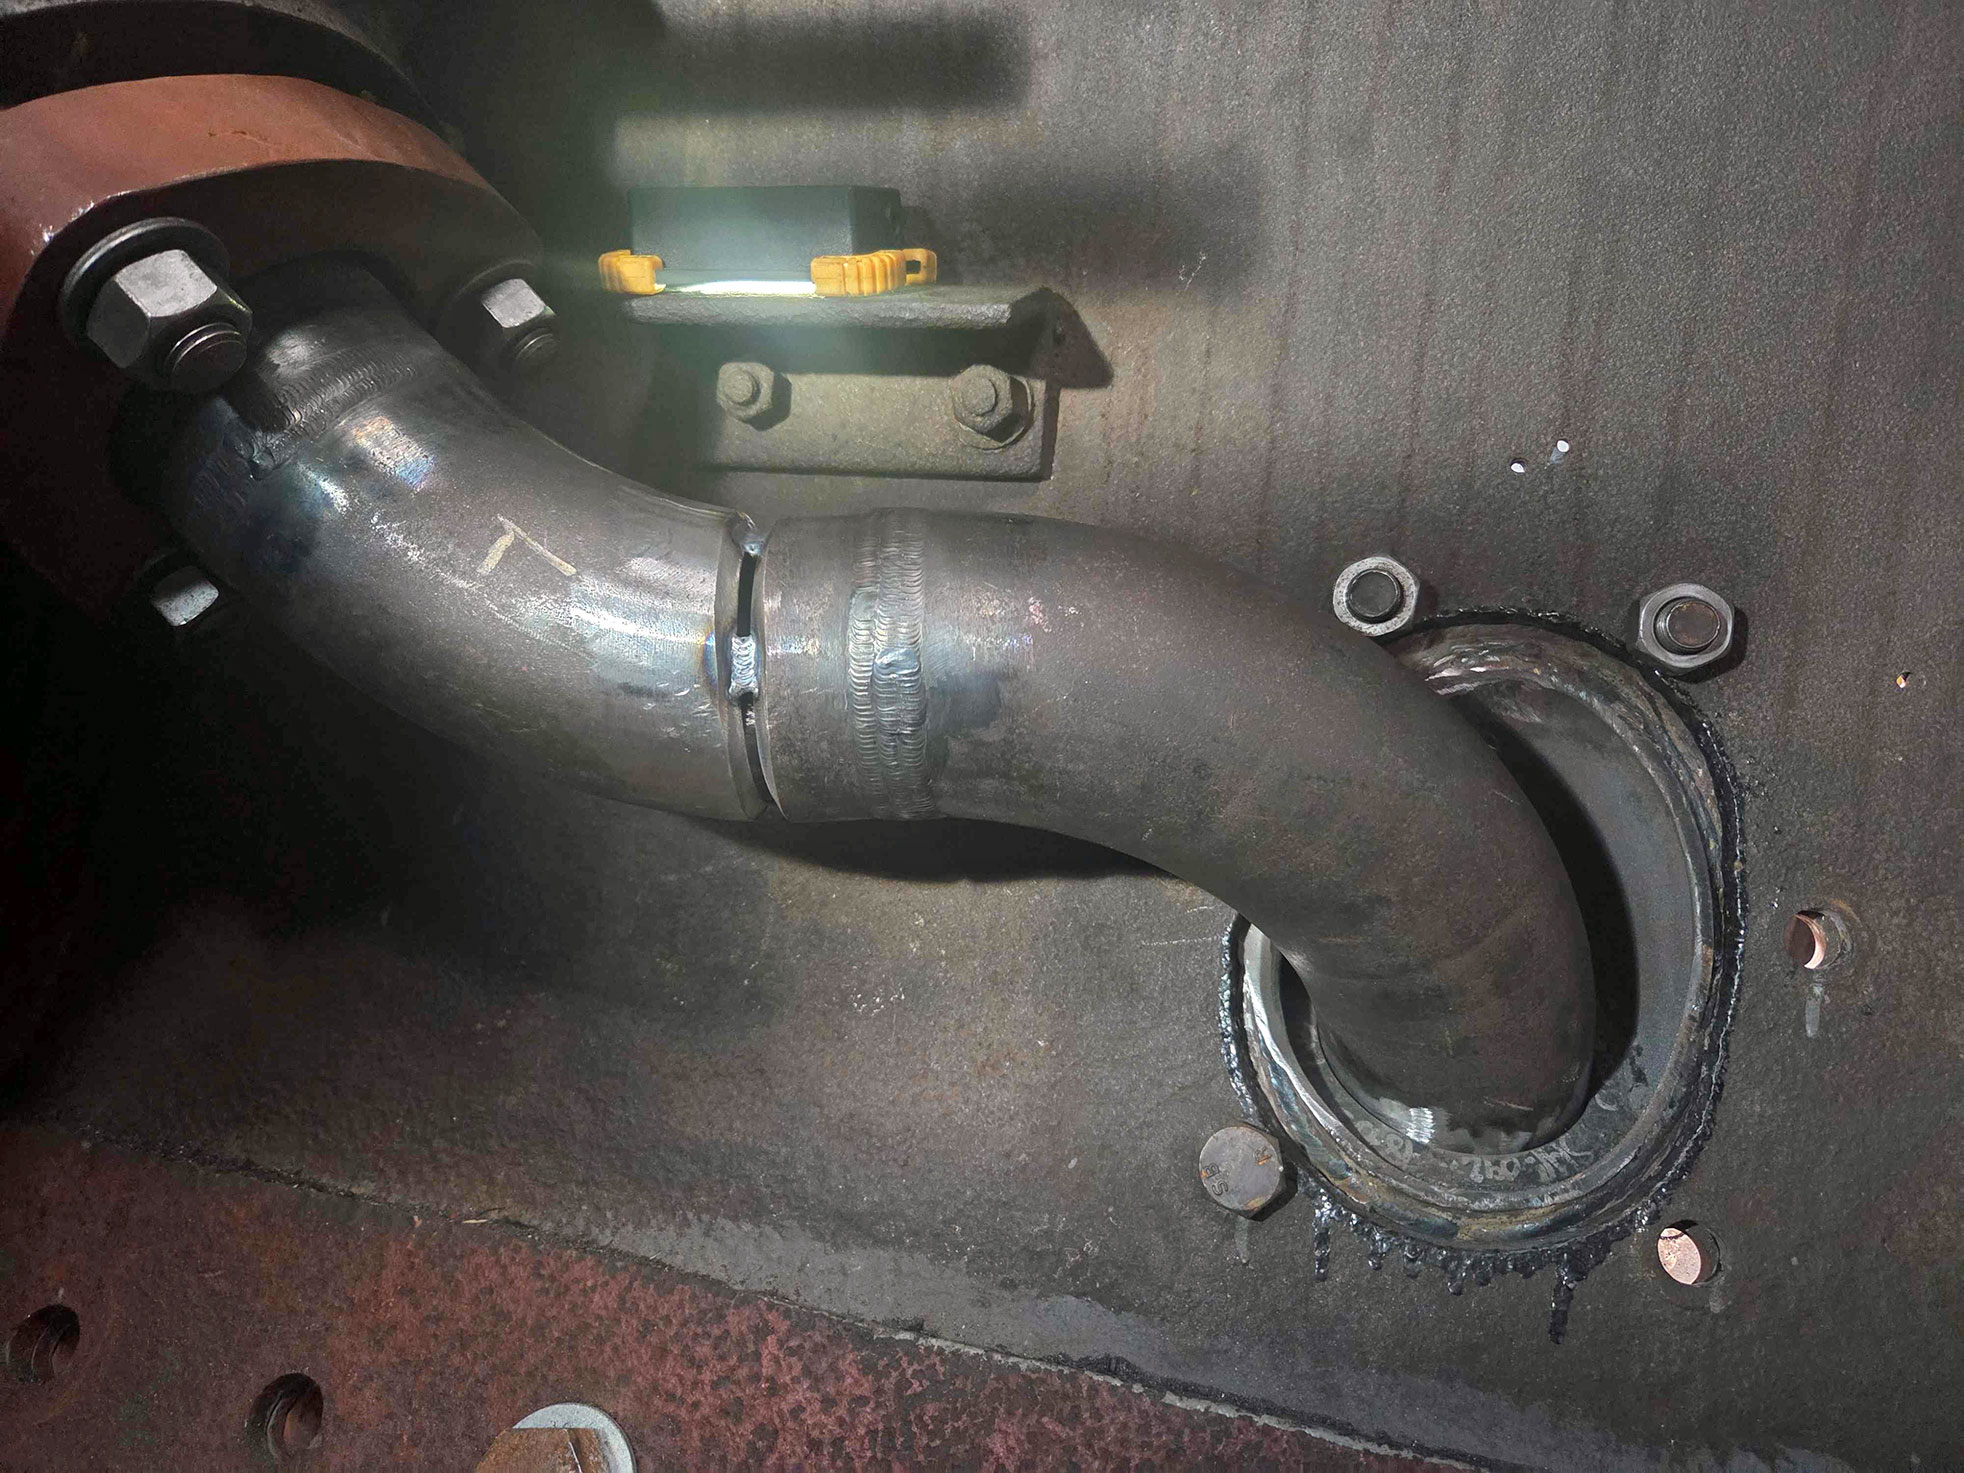
Two photos showing the first of the new steam pipes in place. It has been tack welded together, it was later removed to be taken to the workshop for full welding and testing. Photo: Chris, of Powys Steel.